(WIP) Fermentation station
A WIP project to create fermentation controllers. Designed to be as scalable as possible, with the ability to easily add new fermentation flasks to the existing setup as and when required. A web app will be created to view the status of, and manage, each flask; plus additional features like fermenation diaries.
Fermentation control
My fermenting kombucha sits atop a kitchen cupboard. It’s temperature is essentially subject to the whims of the British weather - given our house is badly insulated in the British fashion, and our heating system maintains something between 15-20C in winter.
As I write, it’s summer and 30C outside. Judging by how much of my ‘first fermentation’ kombucha has simply evaporated - it’s close to that inside too.
This all bodes badly for my kombucha. The poor Symbiotic Culture of Bacteria and Yeast struggles more than I do in these fluctuating temperatures. Hence, my idea for this project.
Project features
- Flasks with PID-controlled heating elements
- Each flask has an ESP32 controller, sensing temperature and comparing to the flask set-point
- Each flask communicates with a central ESP32 controller. The user interfaces with this controller via an OLED screen & rotary / push buttons to view the status of and manage the set-point of each flask
- This means the controller can be in a convenient place, while the flasks can be hidden away if desired
- The hardware and software will be designed such that the number of flasks in a string can be increased (within safe current limits) or decreased at any time
- The central controller will upload data to & read from the cloud (AWS), to support a web app (likely Python Dash or Streamlit) for the setup
Schematic

The sketch above shows the current plan. Bluetooth is used for communcation with the central controller (Bluetooth Master) and each flask (the Slaves). The central controller will upload data to AWS via their IoT Core service; and via a few other services provide data for the front end.
The circuit diagram shows the circuit for each flask. An N-channel MOSFET is used for switching control of the (12V) heating element from the (3.3V) ESP32 GPIO pin.
Progress
So far I’ve:
- Scoped the high-level setup
- Scoped the hardware required
- Created initial circuit diagrams
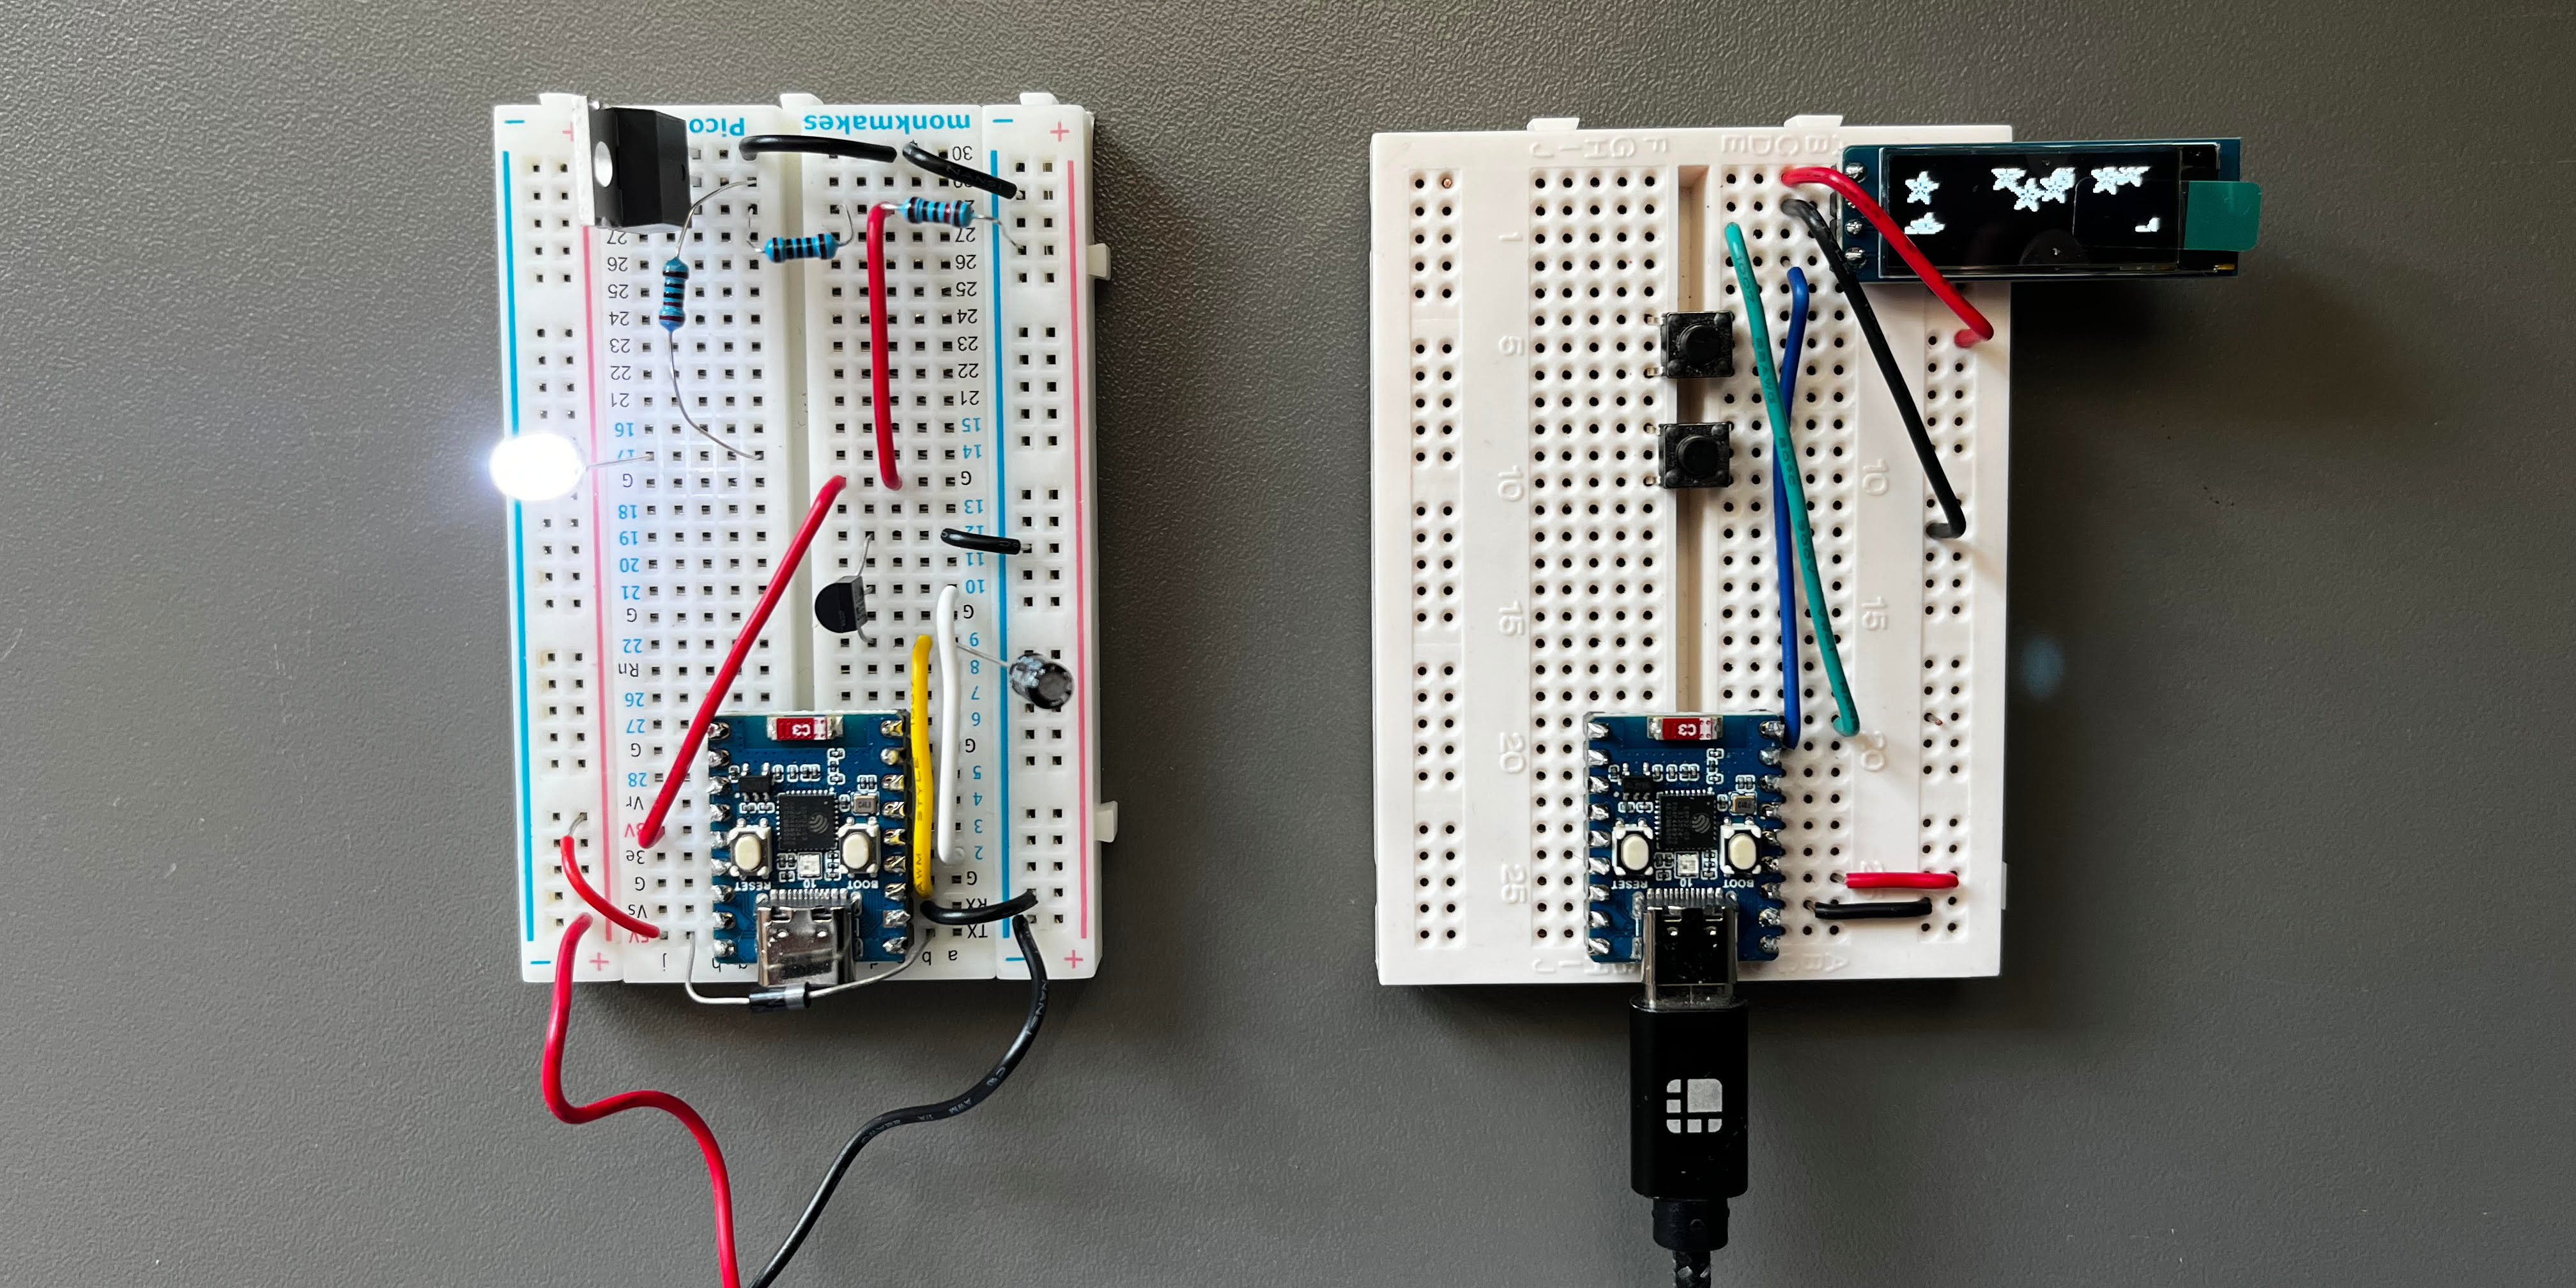
- Begun testing the above with ESP32s on breadboards
Next steps
- Test Bluetooth connectivity between two ESP32s
- Build from simple starting point: send commands from one to another (e.g. “turn on LED”), and send live data back (e.g. display temperature reading from ESP32 A on the ESP32 B OLED interface)
- Prototype a flask
- Test the ESP32 + heating element; can it heat to desired set-points in reasonabe time? If not - do I need a more powerful heating element, or more flask insulation, or both?
- Test PID control
- Design OLED interface & code
- Architect AWS services, test sending ESP32 data to AWS IoT Core
- Code the final Master and Slave ESP32 C/C++
- Design & code front & backend
- Design and make flasks
- Design PCBs for the circuits